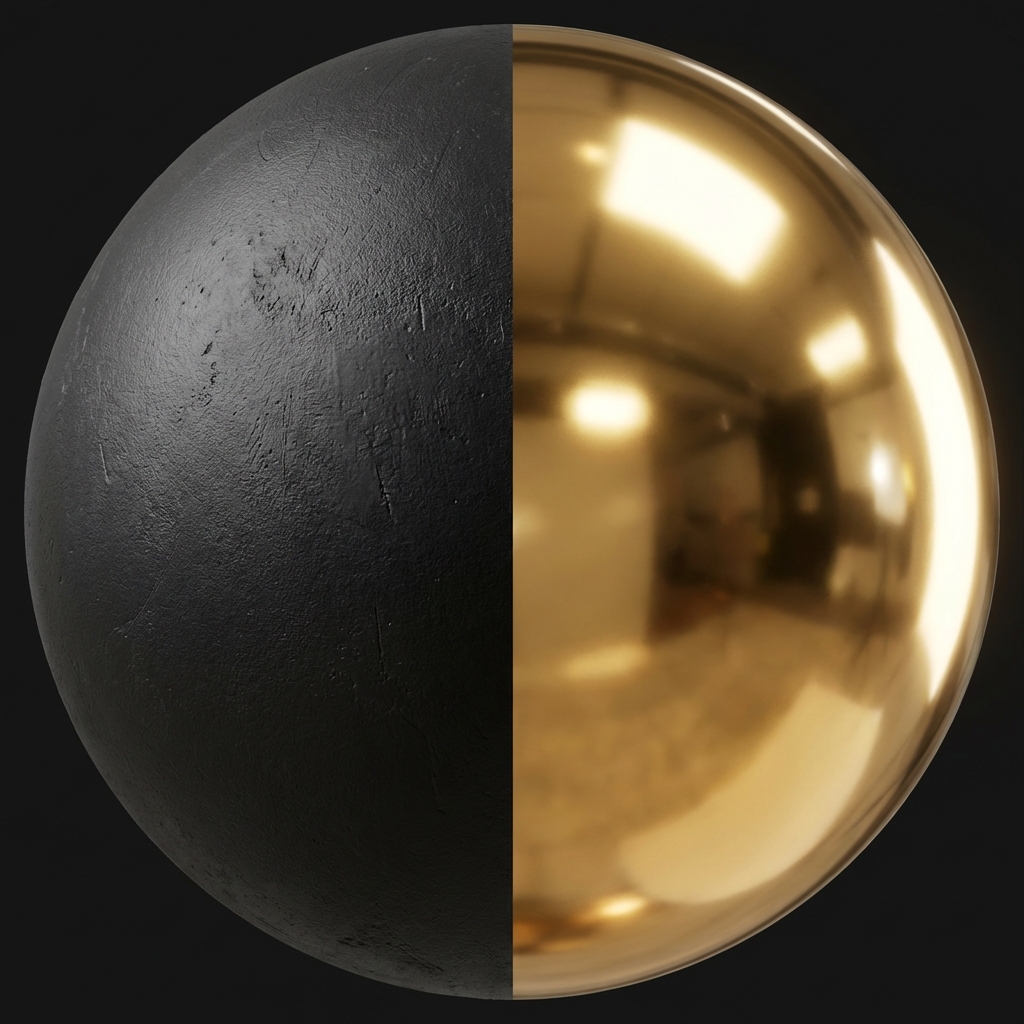
Visualizing Roughness: Left side is High Roughness (0.9), Right side is Low Roughness (0.1).
How shiny or matte an object looks? That's the Roughness Map (or Gloss Map). Get this wrong and everything looks like plastic. Get it right and your materials feel lived-in.
No surface is perfectly smooth — even mirrors have micro-scratches. A Roughness Map tells the renderer how rough the surface is at the pixel level.
- Black (0.0): Perfectly smooth. Light bounces off in a single direction. Result = Sharp, mirror-like reflections.
- White (1.0): Very rough. Light scatters in all directions. Result = Matte, dull appearance (like chalk or dry concrete).
- Pro tip: Good roughness maps include fingerprints, smudges, scratches — all the things that break up uniform reflections and make objects feel real.
Roughness vs. Glossiness: What's the Difference?
You may encounter textures labeled "Glossiness" or "Roughness." They do the exact same thing, but they are mathematical opposites (inverses) of each other.
1. Roughness Workflow (Modern Standard)
Used by Unreal Engine 5, Blender (Principled BSDF), Substance Painter (Metallic/Roughness), and Unity (HDRP).
Logic: "How rough is this?" (White is Rough/Matte).
2. Glossiness Workflow (Legacy)
Used by older V-Ray versions and some legacy game engines.
Logic: "How glossy is this?" (White is Shiny/Polished).
How to Convert Them?
If you download a Gloss map but your software needs Roughness (or vice versa), you don't need to re-make it.
simply Invert (Negate) the image colors. In Photoshop, press Ctrl + I. In a
shader, use a "One Minus" node.
Generate Roughness Maps Online
Upload any image and instantly generate a Roughness map. Our tool creates smart variation based on image contrast.
Start Generator