Creating a Normal Map in Photoshop is a quick way to add detail to your 3D models without increasing polygon count. While there are dedicated tools like Substance Designer or xNormal, Photoshop provided a convenient built-in filter for quick conversions.
Step 1: Open Your Texture
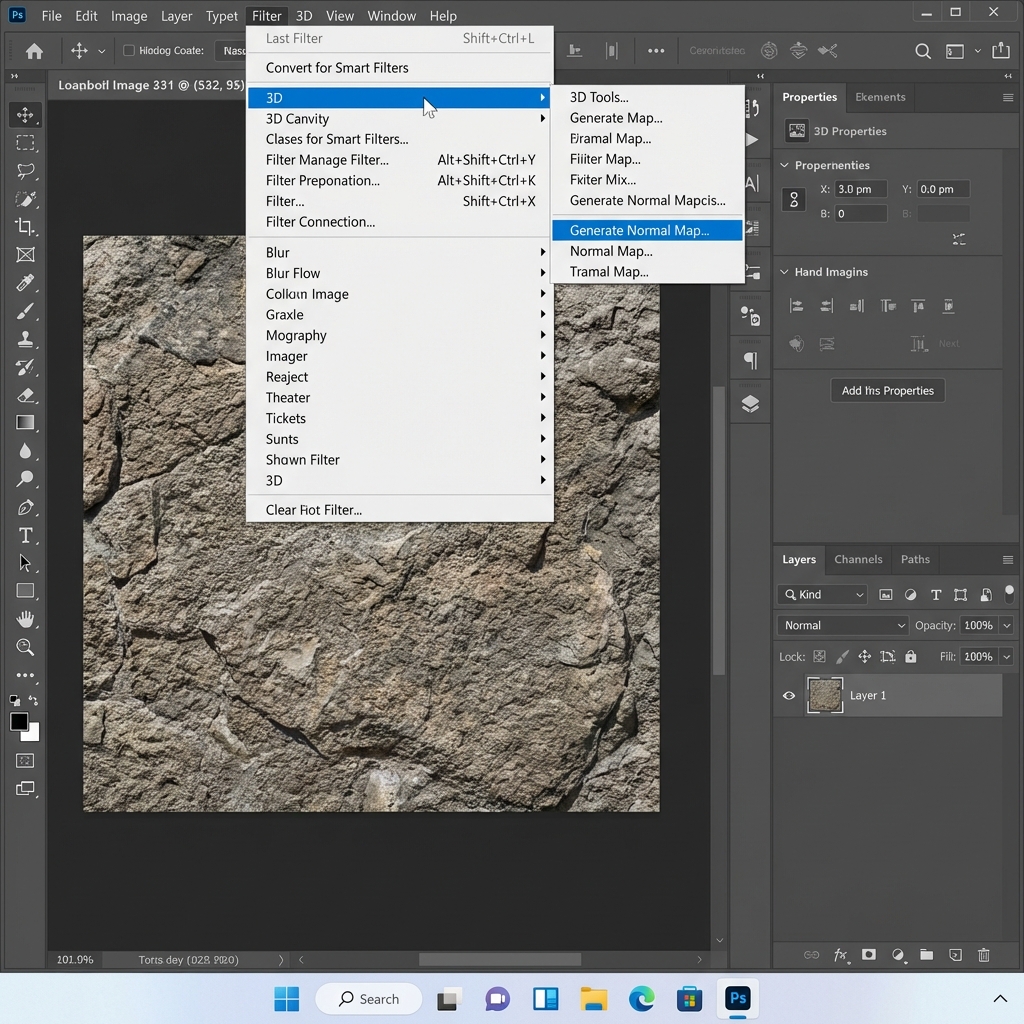
Start by opening the image you want to convert in Photoshop. Ensure your image layer is unlocked (click the lock icon in the Layers panel).
- Go to the top menu bar.
- Select Filter > 3D > Generate Normal Map...

Step 2: Adjust Map Settings
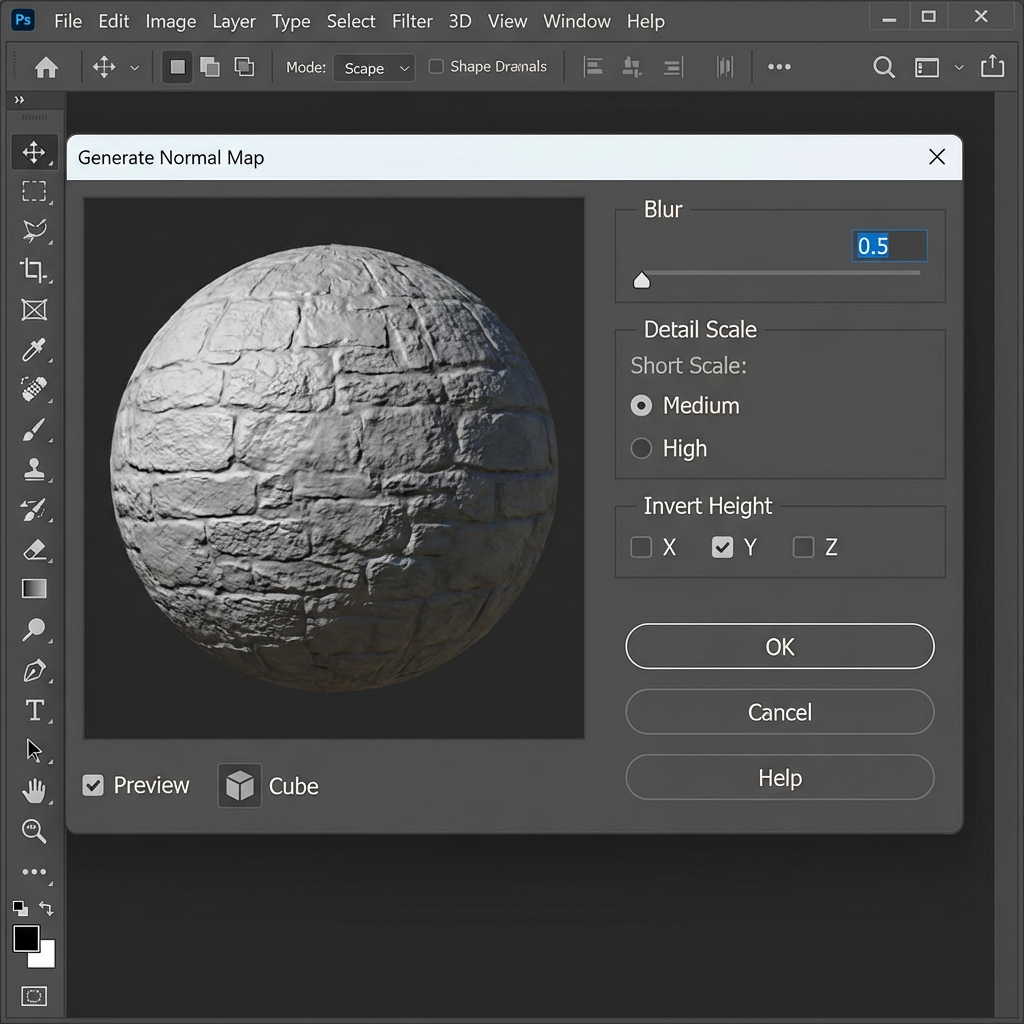
A dialog box will appear with a 3D sphere preview. Here you can tweak how the normal map is calculated.
- Blur: Softens the details. Use a low value (0.5 - 2.0) to avoid noise, but don't go too high or you'll lose crisp details.
- Detail Scale: Controls the contrast of the height map generation. Increase this to make the bump effect more pronounced.
- Invert Height: Check "Invert Height" if your bumps look like dents (or vice versa). Often needed depending on whether you assume white is high or low.
- Cube/Sphere Preview: You can toggle the preview object to see how the map reacts to light.

Step 3: Export the Result
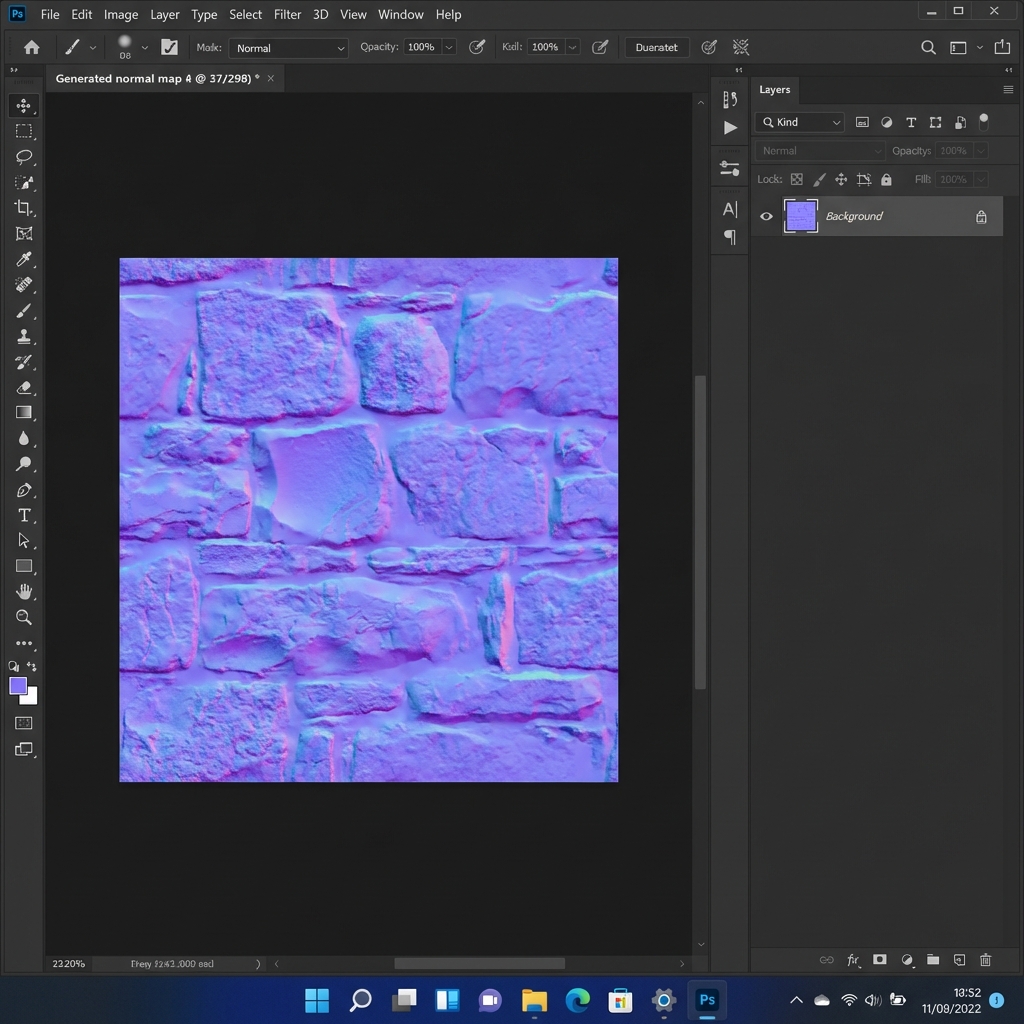
Once you are happy with the preview, click OK. Photoshop will process the image and replace your current layer with a bluish-purple Normal Map.

Saving Your Map
Save the file as a PNG or TGA to preserve quality. Avoid JPEG if possible to prevent compression artifacts that can look like bad geometry in 3D engines.
Don't have Photoshop? Or using a newer version?
Our online tool creates better Normal Maps instantly, with added Roughness, AO, and Displacement generation.